


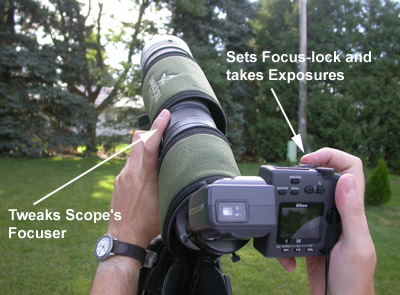
Here is a step-by-step process of my two-handed approach to achieving sharp images when digiscoping birds that just won’t sit still! This technique also demonstrates why I prefer helical over knob-type focusers on spotting scopes. In the above image my right hand is on the camera and left on the spotting scope. My right index finger controls the shutter, which can perform two important things:
- Establish/release focus-lock.
- Take an exposure.

Ignoring the vignetting in this example image, it shows how I’ve selected the auto focus area to apply to the bird’s face (red bracket).
Here’s what do to next:
Use your left index finger to focus the scope (you can use your right thumb to change the area focus bracket to the bird's face). Establish focus-lock with your right index finger by pressing the shutter button halfway down. Check the focus on LCD monitor again and if it looks good then press the shutter button the rest of the way to take the exposure. If the focus on the LCD monitor still appears soft on the bird's face with the focus-lock on, release the lock and repeat this entire step.
This method has given me a lot of focusing control as well as tracking/digiscoping birds that are on the move.
Diagram images © 2005 Michael Allen McDowell


