


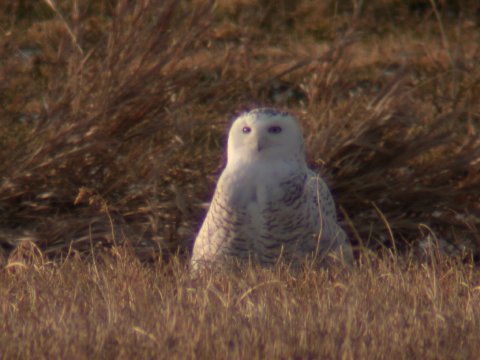
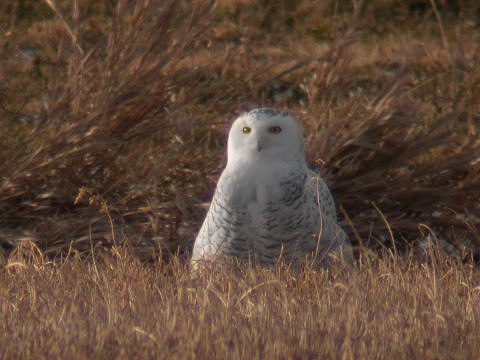
"Can you give any advice on how to prevent the purple coloring on some of my photos? This picture of a Snowy Owl has it really bad. It was taken with Nikon Fieldscope III with 24x WA eyepiece."
(click on image for larger version)
Sadly, it cannot be prevented as it is an optical anomaly of the scope's glass and the lenses of the digital camera, but all hope is not lost. This purple color fringing, or chromatic aberration, is very common with the digiscoping technique. The purple glow comes from the inability of the lenses to focus all colors to the same point. It is especially noticeable in high contrast areas of an image, as this snowy photograph clearly shows where white is adjacent to a darker background, the purple glow on the left side of the owl is characteristic chromatic aberration.
The most effective way to eliminate chromatic aberration is to post-process it out using Adobe Photoshop or other image processing software.
A quick way to reduce (but not entirely remove) purple fringing in an image is to DESATURATE the MAGENTA color channel, but I usually target just the offending area with a series of steps. Using this particular snowy owl image, here's how I cleaned it up.
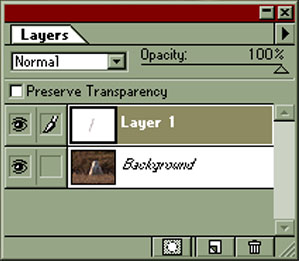
With the image loaded into Photoshop, I used the LASSO TOOL to select the purple area and created a LAYER VIA COPY. This separates the purple area into a unique layer where we can effectively work with just the offending part of the image:
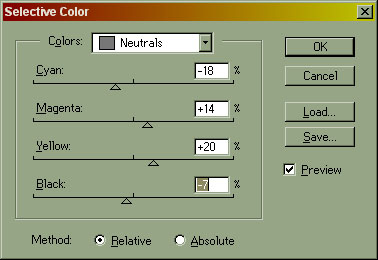
Next, I used DESATURATE to remove all color data from LAYER 1. This rendered a gray border along the left side of the owl. Keeping the focus on LAYER 1, I used the SELECTIVE COLOR function and change COLORS to "Neutrals" and adjusted the slide controls changing the color of the gray area until it matched the background colors perfectly. For this particular image, here were the final adjustments made:
Presto! The chromatic aberration is gone:
(click on image for larger version)
Additionally, I modified the LEVELS and SHARPENED the image. I also used the SPONGE TOOL set to DESATURATE to make the owl's white stand out (also took out some additional purple on the owl's body). Since the owl's eyes also had some purple, I used the LASSO TOOL and selected the eyes to create another layer to run SELECTIVE COLOR to bring them back to yellow. This last step utilized the same technique as above, but instead of matching the color to the background I simply made the eyes yellow with the slide controls.
There are many other ways to remove chromatic aberration from digiscoped images, but this is the technique that has yielded the best results for my work.


